Temporary walls are great and useful for many projects. Most contractors will construct a temporary wall during a renovation to section off the renovated space. Choosing the options and alternatives for temporary walls is a big factor that can help you make an informed decision that saves your budget by renting or putting them up yourself.
In this article, we’ll discuss how to divide a room with a temporary wall. Join us as we explore the benefits of using temporary walls to create versatile living spaces.
How to Divide a Room with a Temporary Wall
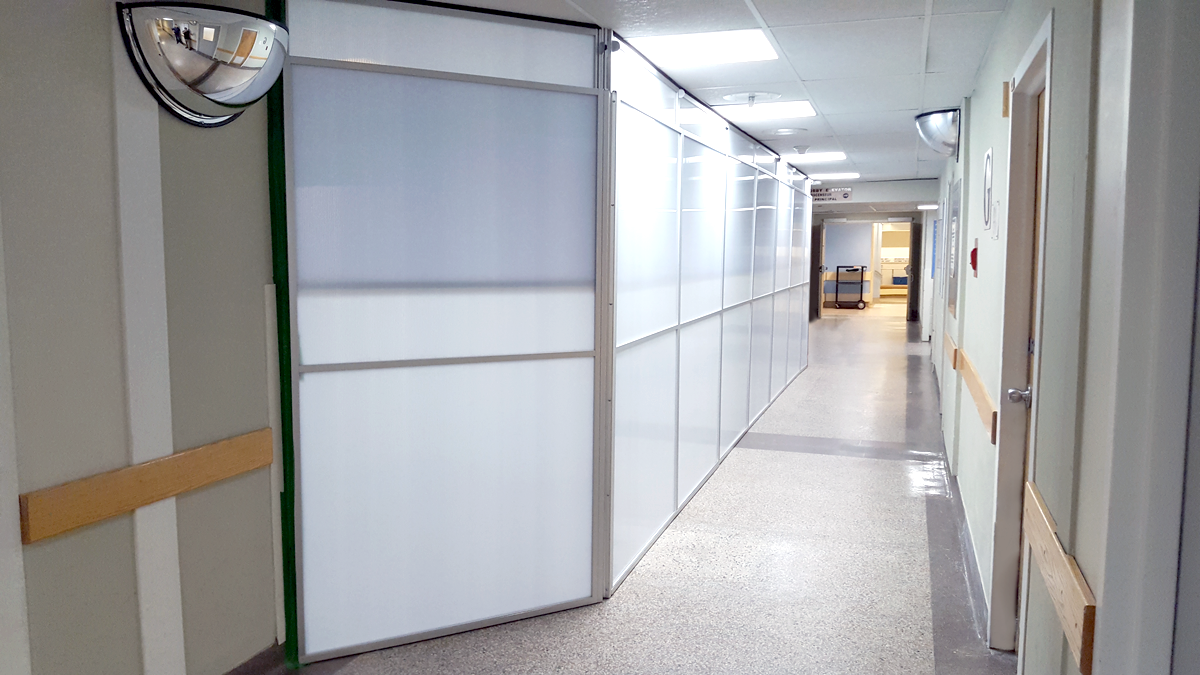
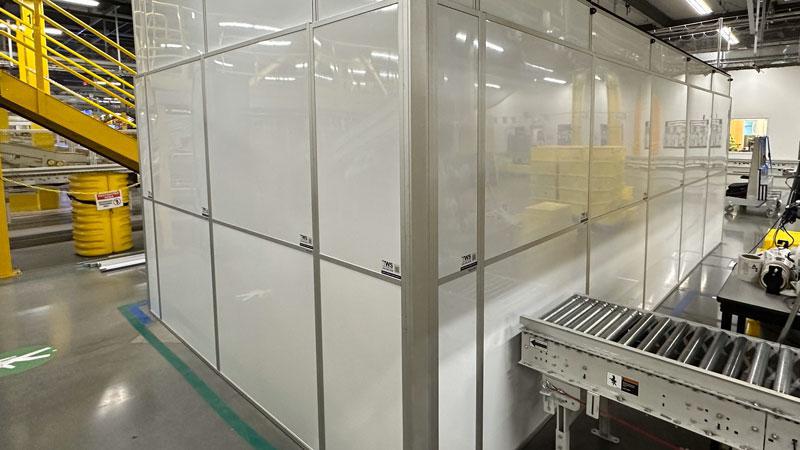
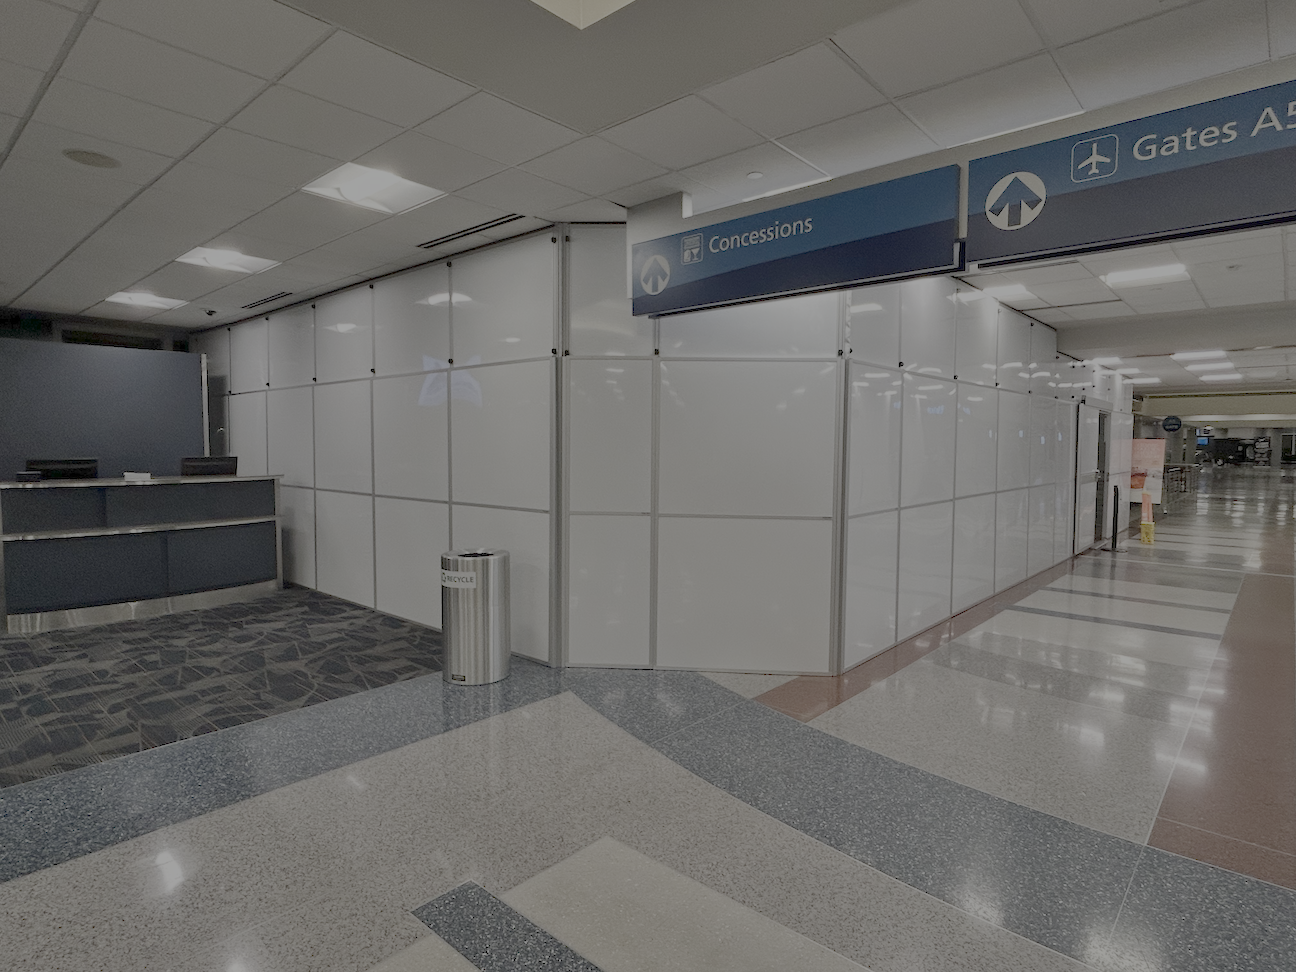
Mastering the art of creating temporary walls can be a game-changer. When learning how to divide a room with a temporary wall, consider the two options: modular partition systems and drywall construction.
- Modular Partition: These partitions are not only versatile but also easy to install and remove without causing damage to existing structures. Additionally, modular partitions often come with various customization options, enabling contractors to tailor the design to meet specific aesthetic and practical requirements. Learn more about types of temporary walls.
- Drywall: Drywall construction offers a more permanent solution for dividing a room. Though it requires more labor and time for installation compared to modular partitions, it provides a sturdy and seamless finish. Contractors opting for drywall should prioritize precision in measurement and installation to ensure a flawless division.
How to Build a Temporary Wall the Sustainable Way
Building a sustainable temporary wall involves considering the environmental impact and optimizing resource use. Modular temporary walls are the best solution for sustainability. Here are the steps to construct an eco-friendly temporary wall:
- Assess the Space:
Begin by thoroughly assessing the room you intend to divide. Consider factors such as the size of the space, the desired placement of the temporary wall, and any specific requirements from the client.
- Choose the Right Modular Wall System:
Select a modular wall system that aligns with the project’s needs. Consider factors such as material, height, and customization options. Ensure the system chosen is easily assembled and disassembled.
- Take Accurate Measurements:
Precise measurements are crucial for a seamless installation. Measure the height and width of the room, accounting for any obstructions such as doors or windows. Take note of electrical outlets and other fixtures.
- Prepare the Workspace:
Clear the room of furniture and other obstacles to create a conducive workspace. If necessary, lay down protective coverings to prevent damage to the existing flooring.
- Assemble the Modular Panels:
Follow the manufacturer’s instructions to assemble the modular panels. Typically, these panels interlock or connect using a straightforward system. Ensure each panel is securely in place before proceeding.
- Install Support Structures:
Some modular wall systems may require additional support structures for stability. Install any necessary brackets, floor supports, or connectors as specified by the system’s design.
- Position the Modular Wall:
Carefully position the modular wall in the desired location, ensuring it aligns with the measurements taken earlier. Check for levelness and adjust as needed to maintain a straight and uniform appearance.
- Connect Panels Securely:
Once in position, connect the modular panels securely to create a continuous wall. Double-check the connections to guarantee stability and safety. Some systems may include locking mechanisms or additional accessories for reinforcement.
- Customize as Needed:
Take advantage of any customization options provided by the modular wall system. This might include the integration of doors, windows, or additional features based on the specific requirements of the room division.
- Inspect and Make Adjustments:
Conduct a thorough inspection of the installed modular wall. Address any issues or make necessary adjustments to ensure a professional finish. Confirm that the wall is secure, plumb, and aligned according to the initial measurements.
How to Build a Temporary Wall the Cheapest Way
Constructing a temporary wall is cost-effective and involves dry-fitting a frame using two-by-fours, wall and ceiling studs, and then covering it with drywall sheets. While it’s the cheapest way available, it does demand a fair amount of effort. Here’s our guide below on how to build it.
You Will Need:
| Materials | Tools or Equipment |
| ● 1/4-inch rigid foam insulation board ● Interior or Pressure-treated 2×4 ● Drywall screws, 1 5/8-inch long ● 2 1/2-inch screws ● 5-inch lag bolts ● Carpenter’s glue ● Galvanized nails, 2 1/2-inch long ● Dywall sheets, 4×8 | ● Utility knife ● Pencil and indelible marker ● Circular saw ● Cordless drill ● Painting supplies ● Drywall knife ● Hammer ● Tape measure ● Electric miter saw |
Step-by-Step Guide:
1. Measure Ceiling Height
Use a tape measure to gauge the ceiling height, assuming it to be eight feet for this project. When situating the wall, ensure it rests on a sturdy base and is positioned beneath a space permitting at least four attachment points. This could mean aligning it perpendicular to joists or directly beneath and parallel to a joist or beam.
2. Cut Wall Studs to Size
Use either the miter or circular saw to cut two-by-fours at a length of 92-1/2 inches for the vertical wall studs. This measurement is strategically chosen to accommodate the thickness of both the top and bottom plates and the foam spacers. Adjust your cuts for the wall studs based on the specific height of your ceiling.
3. Cut the Wall Foam Spacers
Use an 8-foot 2×4 as a guide to mark three segments of rigid foam measuring eight feet by 3-1/2 inches. Then use the utility knife to cut the foam.
4. Assemble the Wall Structure
Position the two 96-inch 2x4s on the floor, running parallel and spaced approximately 93 inches apart. These serve as the wall’s top and bottom plates. Place two wall studs at the ends and evenly distribute the remaining five studs between them. Mark five 16-inch on-center positions for the middle studs, ensuring the top and bottom plates bear identical markings.
5. Secure Top and Bottom Plates with Studs
Secure each stud between the top and bottom plates using a hammer and nails. Face-nail through the plates into each end of the stud, avoiding toe-nailing for enhanced stability.
6. Attach Bottom Foam Spacer
Apply the carpenter’s glue to affix the bottom foam spacer to the bottom plate. Wipe away any excess glue and allow it to dry completely. This spacer is a protective barrier, preventing any damage to the floor surface.
7. Raise and Anchor Wall to the Ceiling
Lift the wall into position with the help of an assistant. Slide the two upper foam spacers into their designated spots and securely fasten the wall to the ceiling using four 5-inch lag bolts equipped with washers. For a robust and stable installation, ensure the bolts are anchored at sturdy points, such as the ceiling joists.
8. Securing the Wall to the Floor
Attach the bottom wall plate to the floor using 2 and 1/2-inch screws. Begin the process by drilling pilot holes to avoid any potential cracking in the bottom plate and the floor.
9. Hang Drywall for Finishing
Secure the drywall sheets to the studs using a cordless drill and drywall screws. Achieve the desired finish by applying drywall tape and compound.
Renting Temporary Walls for Custom Needs
Renting temporary walls is great because it allows for flexibility and efficiency. When renting, construction managers can save time as they won’t need a team member specifically trained in the modular wall system.
If you need a more custom solution to your needs, especially for healthcare or commercial settings, we recommend renting temporary walls. Reach out to us today for a free consultation and tailored estimate.